

The success of marketing campaigns often depends on the tools that are used. Especially with business models that involve sending emails (e.g. creators, newsletters or SaaS companies). On the one hand, the businesses must be able to rely on robust tools and, and on the other hand, depend on a high degree of customization so that all campaigns remain in the look and feel of the brand.
Two powerful tools in the marketing toolbox of many of these companies are Webflow and ConvertKit. Webflow is known for its intuitive design interface, with which web layouts can be implemented pixel-perfectly, and ConvertKit for its robust email marketing, which also includes surrounding services.
The good news is that both platforms can be seamlessly connected to get the best of both worlds. Therefore, this post focuses on how a form designed in Webflow can transfer data to ConvertKit.
What are the benefits of Webflow x ConvertKit
The obvious advantage of this method is freedom of design. ConvertKit is great, but the design of forms is definitely expandable. With Webflow, you can style forms granularly, but you don't have any additional email marketing features. By combining both tools, you can customize the visual appearance of your form exactly as you imagine for the campaign — without any compromises.
Connect a Webflow form to ConvertKit in 3 steps
The easiest way to use ConvertKit on Webflow websites is to embed the JavaScript that you can get from your ConvertKit account. But if you want to use your Webflow form, all you have to do is follow these 3 steps:
1. Customize the email address field
First, you need to jump into the email field settings in your Webflow form and change the field Text field settings > Name into “email_address”. By default, the field is named “Email.” By making this change, you ensure that the email field exactly matches the form name in ConvertKit. For security reasons, you can also use “email-address” as the ID of the field.
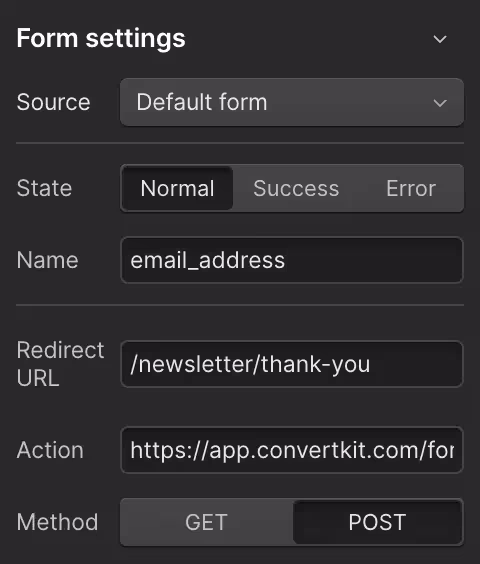
Repeat this step for all fields that you want your form to have.
2. Change the form action
In the second step, you must change the action of the submit button. You can do this in Form Settings > Action. Insert the ConvertKit URL of your form into ConvertKit here. It has the following formatting:
https://app.convertkit.com/forms/{Formular-ID}/subscriptions
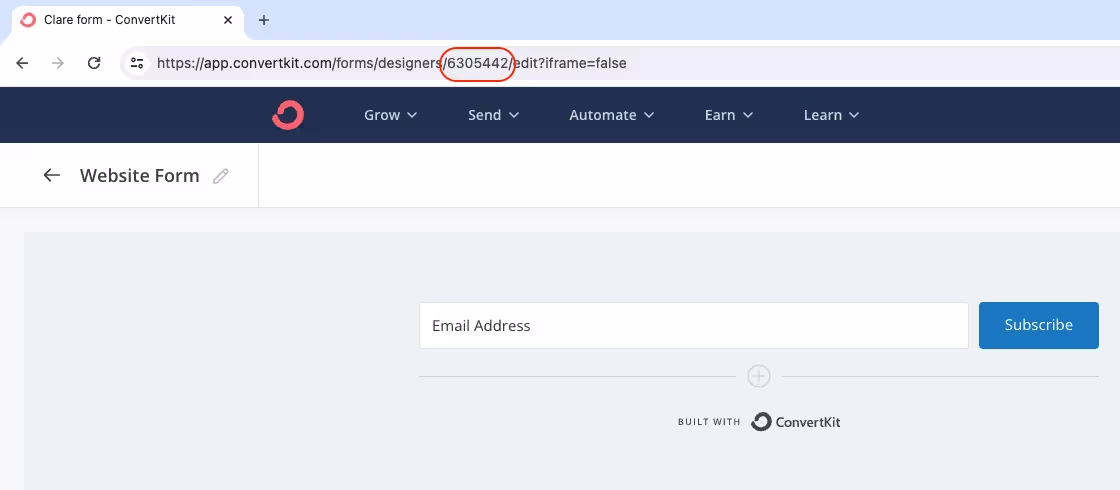
The form ID must be replaced with your correct form ID. You can find the form ID in the form builder URL when you edit your form in ConvertKit. For example, if your form ID is “1357975,” then the URL would be:
https://app.convertkit.com/forms/1357975/subscriptions
3. Change the form method from Get to Post
The last step is done with one click. Change the method from Get to Post in the form settings. Now you can publish and test your form. You should now be able to see form submissions in ConvertKit.