

How to optimize your Webflow site before launch
It's done, the design from Figma was successfully and responsively transferred to Webflow and the new website shines. Now all you have to do is click on “Publish” and the page is live. Or? Below, we'll show you which mistakes you can avoid before launch and how to optimize the page before launch.
Why is pre-launch optimization important?
If the new website has been professionally designed and developed and is also displayed flawlessly at all breakpoints in the Webflow Preview, there is basically nothing standing in the way of the launch. However, errors may have crept in that have a negative impact on your SEO ranking, slow down your page speed and restrict the usability and accessibility of your site. We observe the following errors more frequently when pages are published “just like that”:
- CSS classes were not cleaned up in advance and reduce page speed
- Animations are loaded that are no longer used
- Meta titles and meta descriptions of the individual pages are missing
- Meta tags that explain what can be seen in images are missing
- High-resolution images are used
- The favicon and the web clip are not changed and the Webflow logo is therefore displayed by default
- A site map is not automatically generated
- The global canonical URL is not set
- etcetera
How do I optimize my Webflow site before it launches?
So that you don't have the above mistakes and that your website is loved and ranked well by users and search engines such as Google right from the start, we have put together 5 tips for you that you can quickly and easily implement yourself:
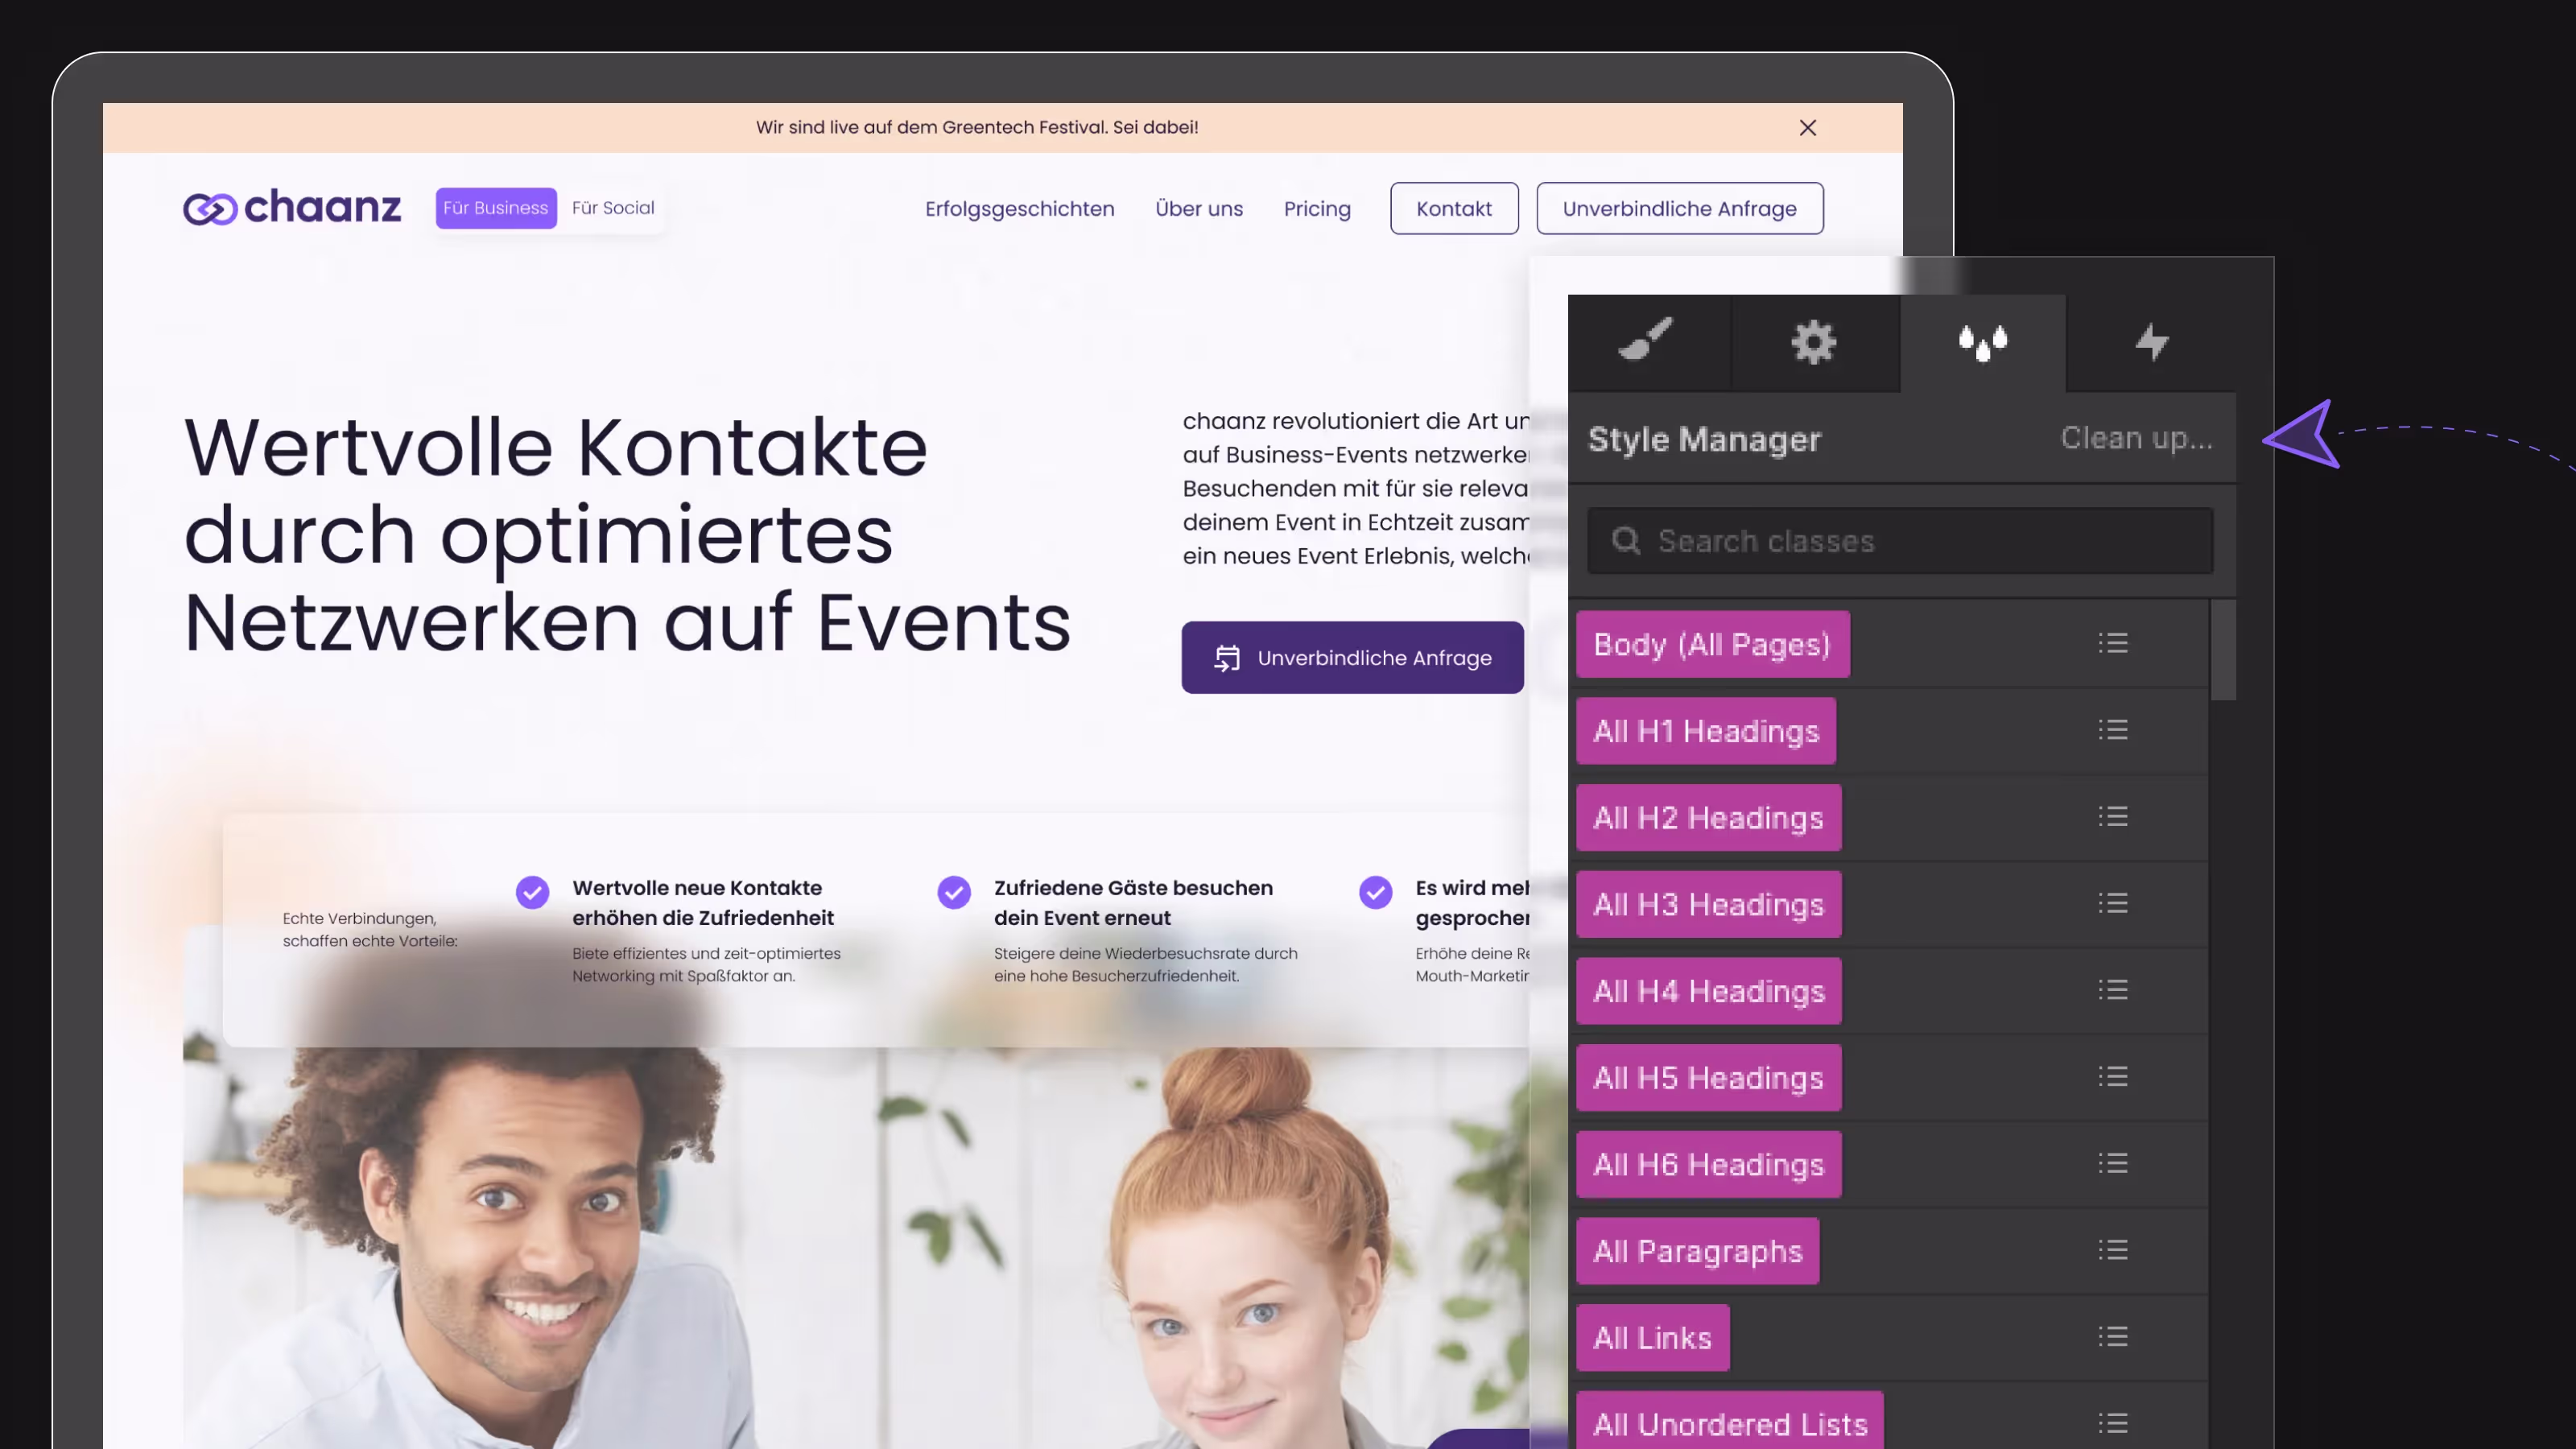
1. CSS & animations clean up
With two simple clicks, you can increase the performance of your site. Webflow makes it easy for you to completely delete unused CSS classes and animations from your website and thus increase loading speed. To do this, go to the Style Manager and the Interactions Panel (both in the top right corner of the Webflow Designer) and click on “Clean Up.” A window opens below, which gives you an overview of how many CSS classes and animations will be deleted.
2. Set meta titles and meta descriptions
The meta titles of your subpages briefly summarize their content and can massively increase your ranking and the click rate of your website if they are formulated interestingly and concisely. It is therefore advisable to set a meta title on all pages that briefly and concisely describes what a user can expect on the page.
Example: The 5-step guide to improve your page performance.
In addition to the meta title, the meta description should also outline exactly what a user can expect on your site. While the title is ideally around 70 characters long, the meta description can also be a 2-3 line. If the title makes you want more, the description can lead to even more clicks. In addition, the description is displayed directly below the title in Google search results.
Example: Slow loading times of a website not only lead to frustration for your site visitors, but also to a poor ranking on search engines such as Google and Bing. We've put together 5 steps on how to increase the page speed of your Webflow website.
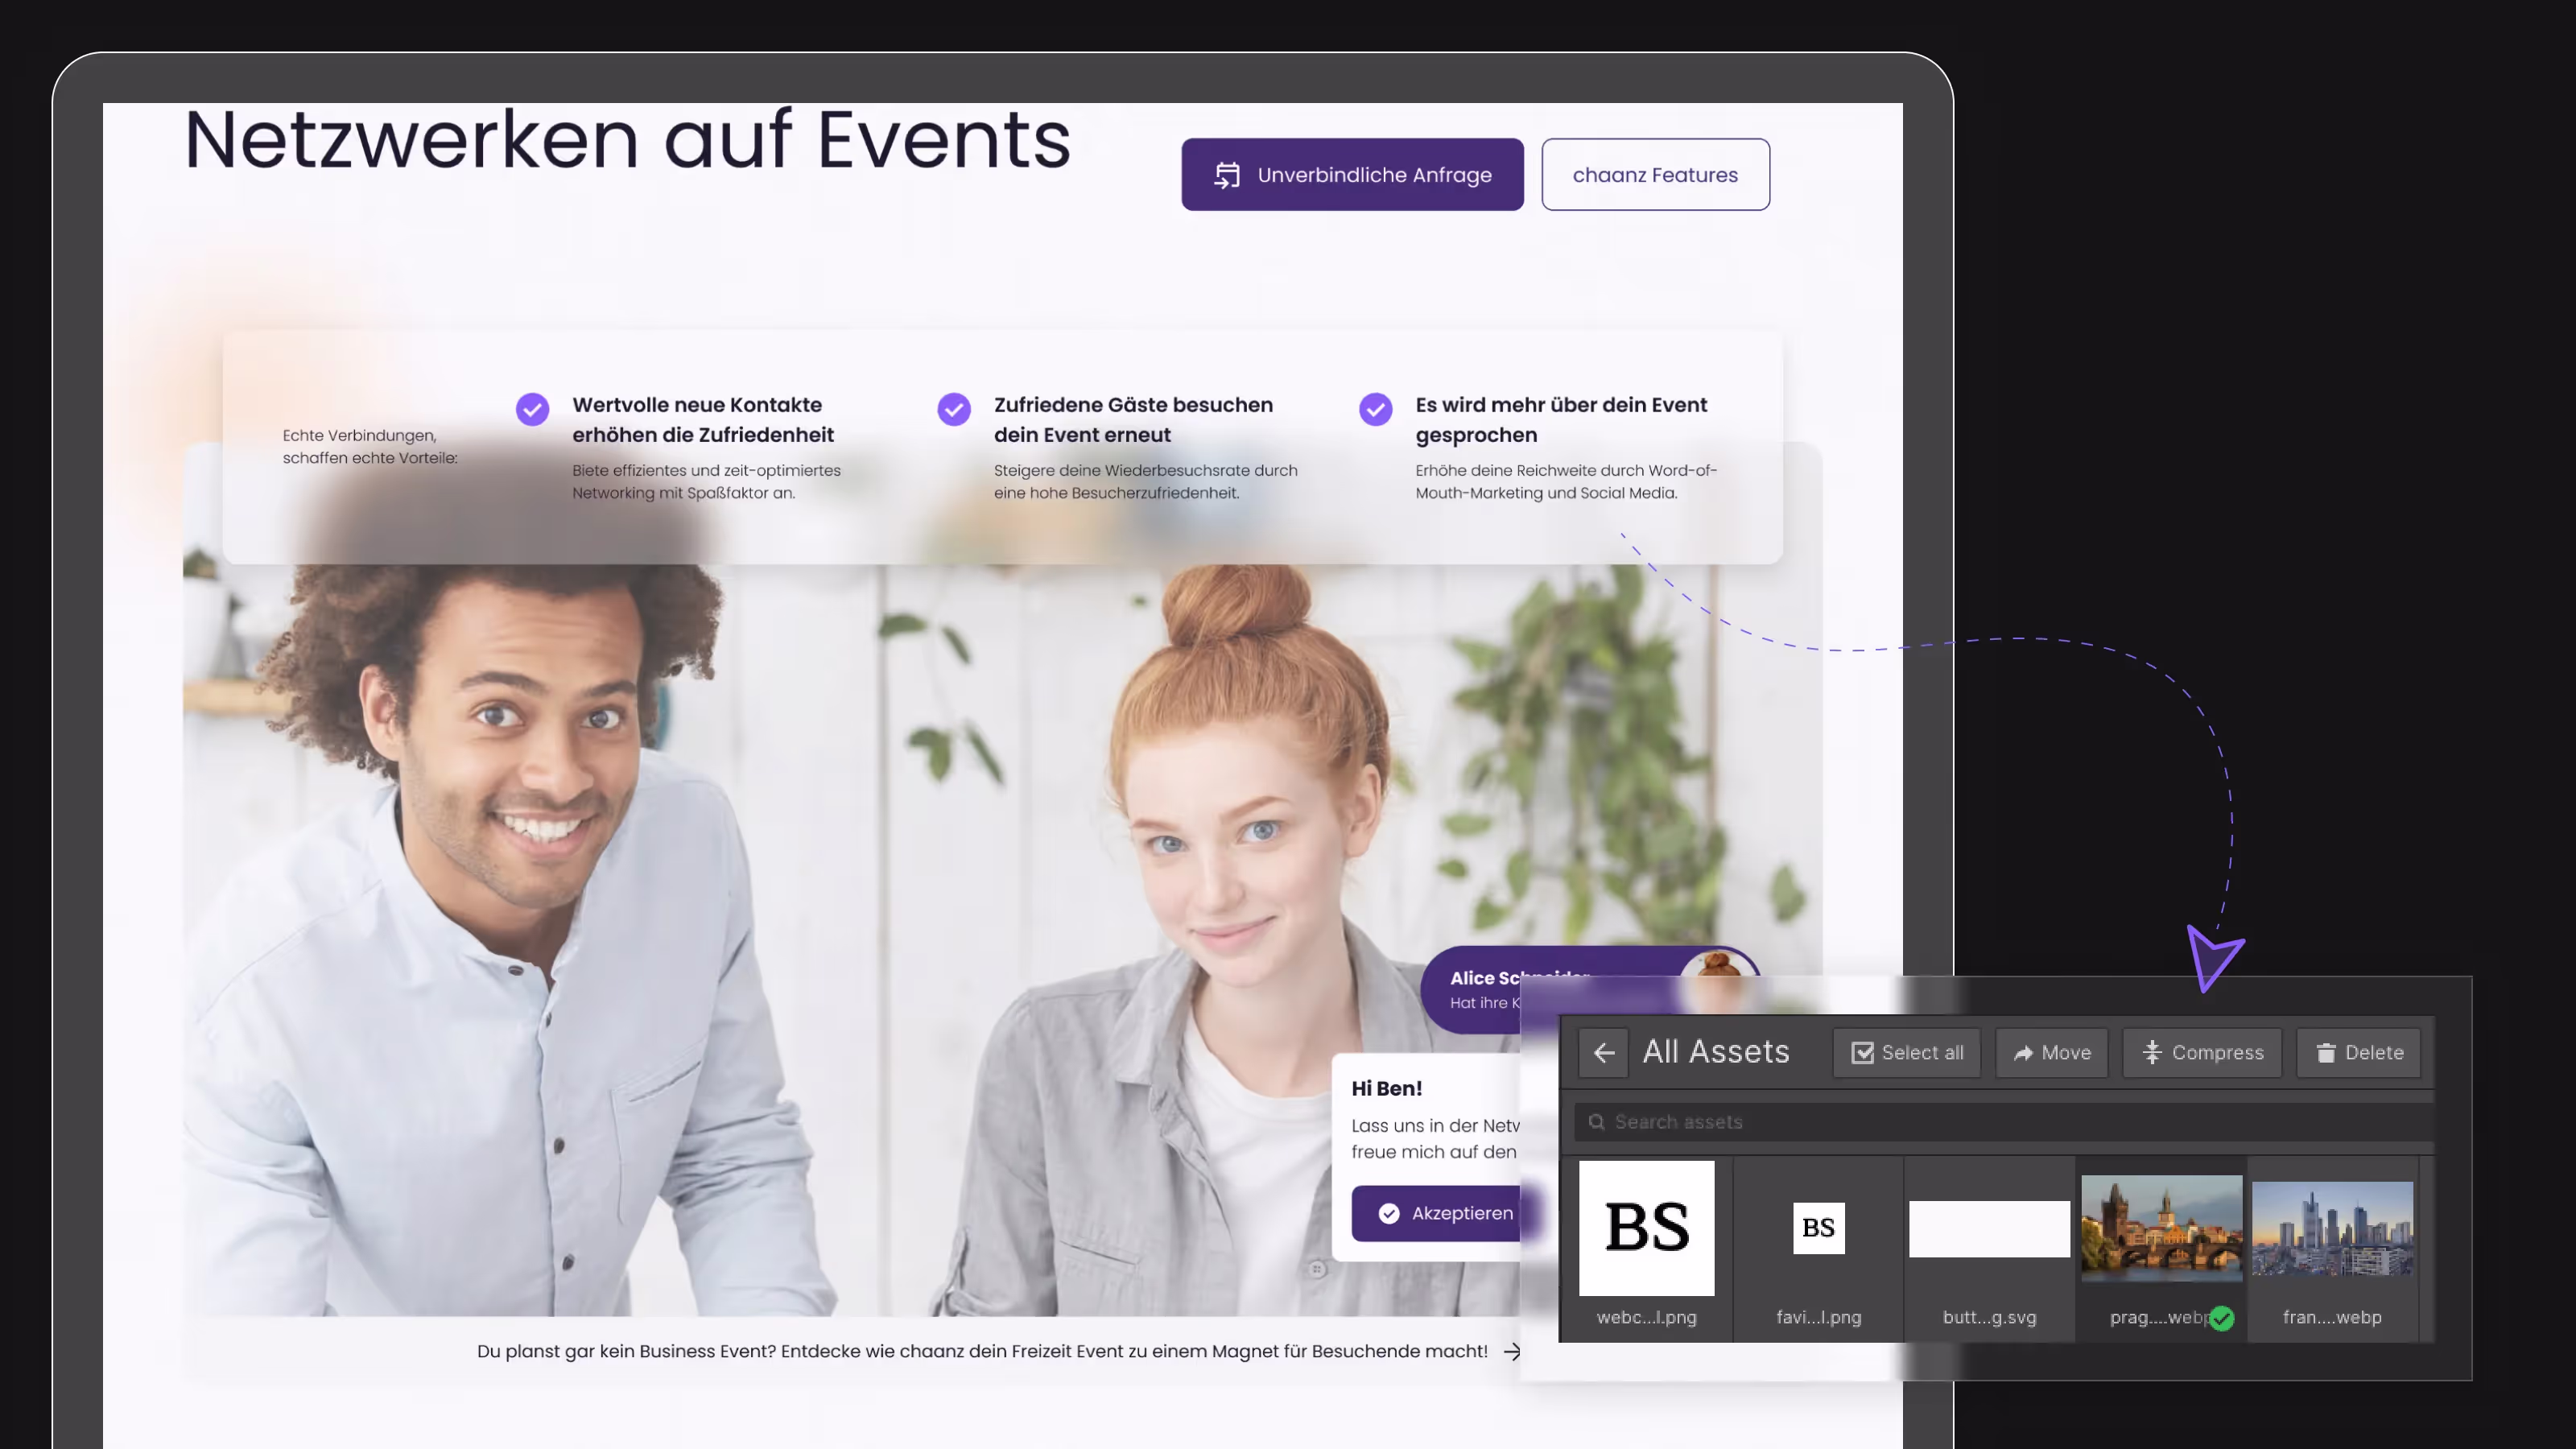
3. Compress your images and give them meta tags
Images are often central content of websites and an integral part of Webflow. However, images, especially in high resolution, are also an absolute killer of your page performance. Therefore, you should compress all images to a minimum file size before uploading them to Webflow. If you can't do this directly in your graphics tool, there are a variety of providers on the Internet who will do it for you directly in your browser.
Pro tip from the VE team: You can also compress images directly in Webflow into the modern WebP format. To do this, simply select the images in the assets panel and click on “Compress.”
In the second step, it is recommended that you give all images on your website a so-called meta tag. This tag describes the content of the image and can be read by search engines and screen readers. In the case of a very slow connection, the day can also be displayed instead of the image if in doubt.
On the one hand, you increase your ranking in search engines by constantly assigning meta tags and, on the other hand, you increase the accessibility of your website, as even restricted people can now understand and interact with your website content through the help of screen readers.
4. Set your custom favicon and web clip image
We all know them: websites that have a Webflow or WordPress logo right next to their meta title. What is the reason for that? A so-called favicon was not set on these websites. You can easily upload the favicon for your website as JPG or PNG in 32x32px format in the Webflow Site Settings. To do this, simply go to Site Settings/General. The same procedure applies to your so-called web clip. A web clip appears when someone bookmarks your website on an iPhone. The web clip must be uploaded in 256px x 256px format.
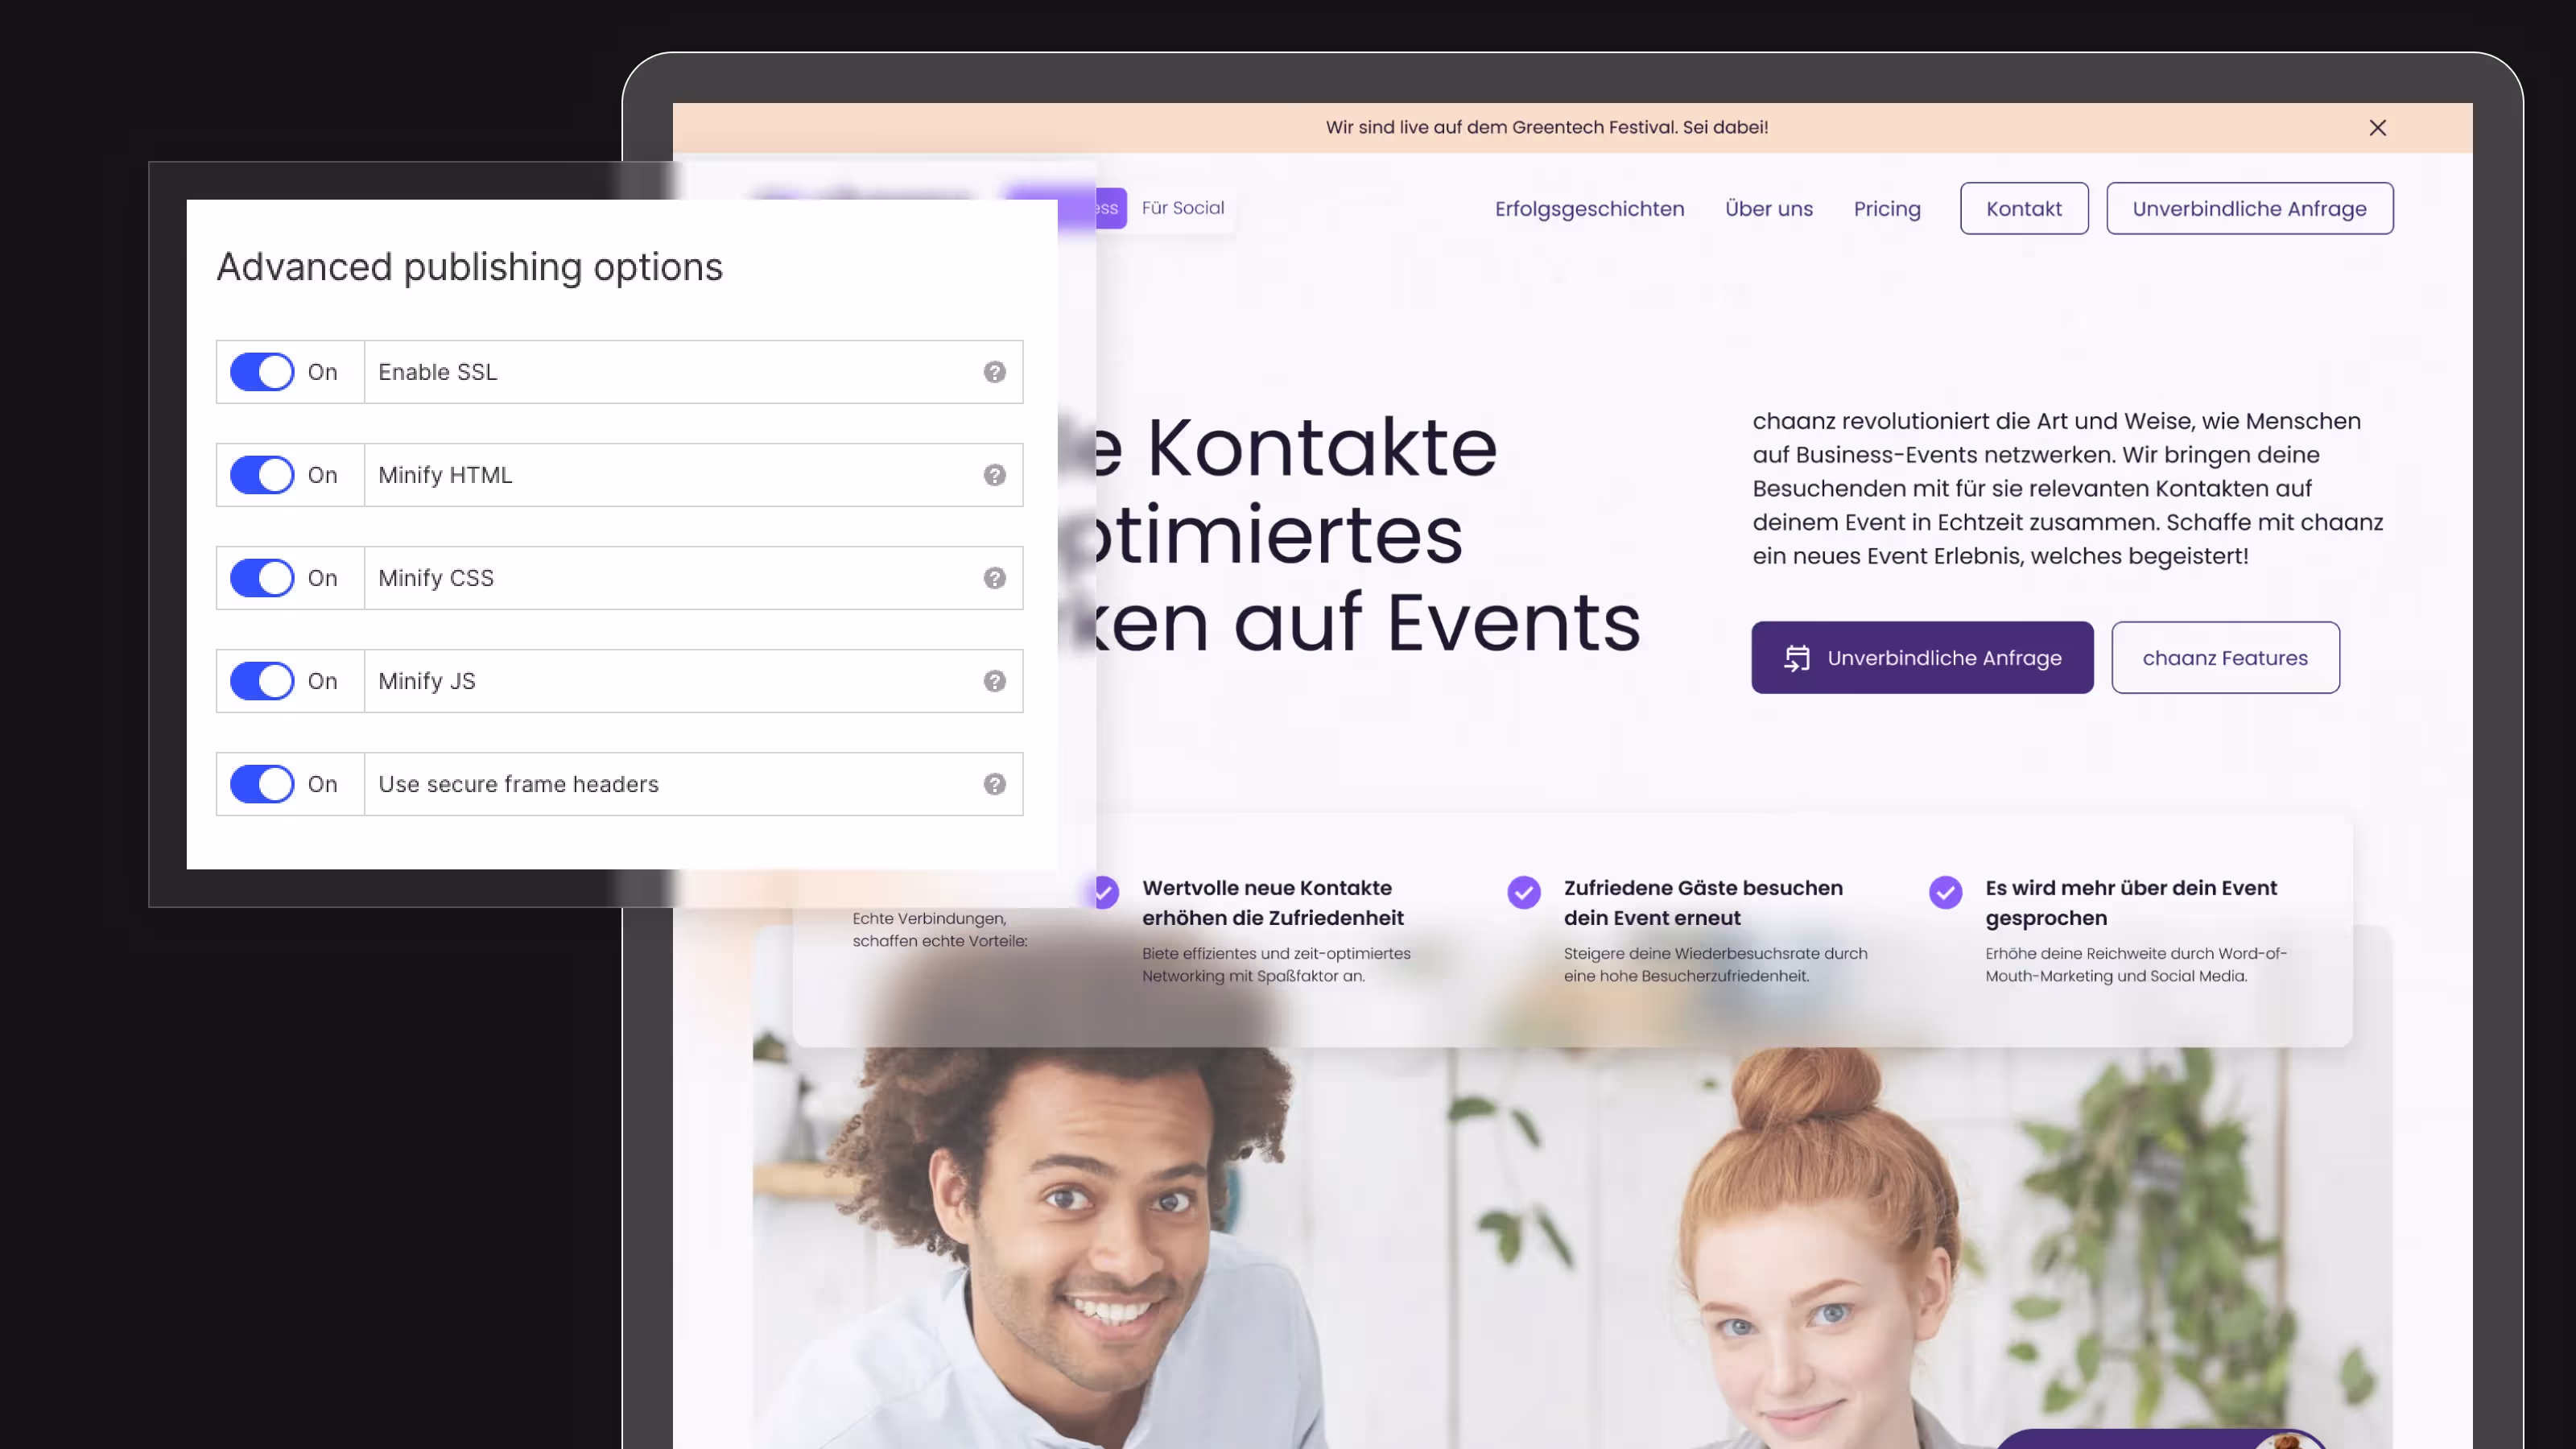
5. Optimize your page settings
If you are already in the page settings, it is recommended that you make other simple but useful settings. In the following, we have divided them according to the menu tabs:
/General: Set favicon and web clip; disable the Made in Webflow badge
/Publishing: Activate SSL, Minify HTML, Minify CSS and Minify JS → this increases your page speed through faster loading speeds
/SEO: Deactivate the subdomain indexing of your .webflow.io domain, activate the automatic generation of the sitemap
/Forms: Put the correct recipient email address in the form recipient field
/Fonts: Check that all fonts are integrated locally and are available in the compressed WOFF/ WOFF2 format → if you have integrated Google Fonts, we recommend that you switch the whole thing to local fonts for GDPR reasons. You can find out more about this in our article: Integrate Google Fonts locally (GDPR-compliant) into Webflow
We also apply all of the above tips 100% ourselves when we create websites on behalf of our customers. We hope this short excerpt helps you optimize your website and achieve long-term success.